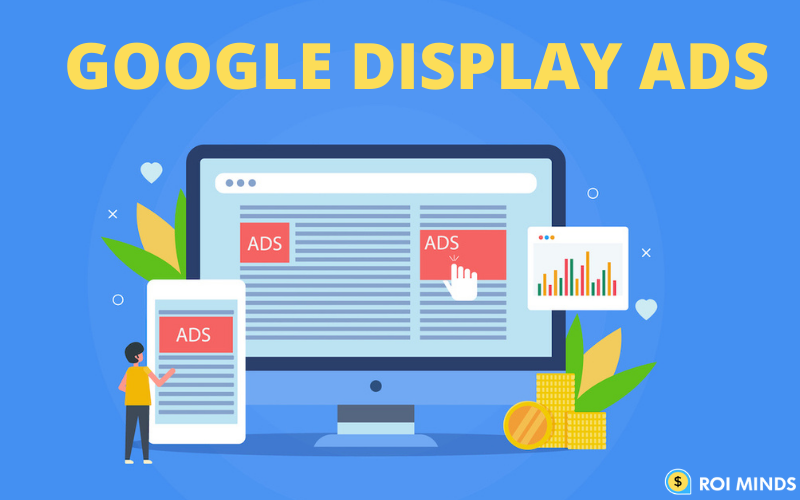
Do you want to increase the number of conversions for your Google Ads? If the answer is yes, GDN is the saviour for you, but many people have trouble making Google Display Network work for them, so I wanted to share a strategy working well for many of our eCommerce clients. Let’s elaborate on this proven strategy in detail.
There’s a trick! You have to spend a lot of cold traffic to your online eCommerce PPCmanagement and then warm it up and convert them.
The most common mistake most marketers make is catching the conversions with the cold traffic. The typical COLD Traffic conversion rates are around 1-2%, whereas you can get up to 60% and 70% conversion rates by remarketing.
Here are the Four Steps to Warm Up Your Traffic and Turn it into Customers
STEP 1: Send Cold Traffic to Amazing Content Pages
Show display ads to Cold traffic to send visitors to some awesome pre-sales content pages that give immediate practical value to your ideal customer.
Instead of sending cold traffic directly to a sales page where you offer something, you need to give VALUE to your customers. For example, you need to address their pain points or say you need to provide solutions to their problems. So, give some initial value to your Cold Traffic by directing them to some awesome content pages that offer value to your future customers.
In this way, you can build your relationship and trust by giving an amazing value and getting your cold audience to begin the process of liking and trusting you or your brand.
Ideally, your content will also spread awareness and knowledge of the issues and make your visitors aware that your solution to their problems exists.
Now, you can analyze the user behaviour on the pre-sales page and segment the audience based on session duration, bounce rate, etc. Use this audience later on and send them on your sales page.
STEP 2: Segment your Hot Traffic from your Warm Traffic
Some of your traffic may go from COLD to WARM and HOT very quickly, and be ready to buy, call, subscribe, signup, download, etc., it can happen within a few minutes to days after clicking on your ad.
There may be only 5% – 15% of your hot traffic, but if they’ve demonstrated that they’re interested, you can retarget them directly with a specific offer.
Most of the white label PPC management services won’t be ready to turn from cold to warm that fast, and you’ll need to warm them up. So, the best approach is to segment your audience!!!
Setup Your Hot audience in Google Ads/Google Analytics and retarget them
You can set up an audience directly into Google Ads or your Google Analytics account and use them in your display campaigns. Your Hot traffic would be the people who know your brand, done Add to carts, initiated checkouts, cart abandonment, etc.
STEP 3: Show Offer Ads to Your Hot traffic to Power Up Your Funnel
You can target your hot traffic by showing them customized ads with special offers such as 10 to 20% discount offers, etc.
You can also launch a Dynamic Remarketing campaign which will work as per the interaction of visitors with your product pages.
STEP 4: Show Value Ads to Warm Traffic to Build More Value & Trust
Your cold traffic will need more value and time before they are ready to make a purchase. For example, it could be 80% – 90% of your traffic. So, you need to retarget your warm traffic with more value.
To give value, you need to show your testimonials, social proofs, etc. and build a relationship with them through different ad creatives such as images and videos.
In a nutshell, firstly, you have to bring relevant cold traffic to your website/eCommerce store, warm it up by giving value and then retarget it.
So, you can scale your conversions in Google Ads if you can target hot, warm, and cold audiences effectively with the Display network, too, apart from utilizing Search and Shopping. All you have to do is segment the traffic, use different creatives and landing pages accordingly and remarket them to ascend your sales funnel.
You can utilize the Discovery Ads as well by using this similar strategy but with different creatives. Want to know more about it? Let me know in the comments section, and I’ll share the complete strategy with you!
We tried our best to make this article as simple as possible that even an 8-year-old could easily understand. So without further ado let’s begin!
Before jumping into google ads, let’s talk about how google works.
It involves 3 parties.
Person – Who has a query.
Google – Where that person searches for that query.
Results – Which answers the query of that person.
To simply put, This is sam. His mom’s birthday is coming and he wants to give her a beautiful present.
Now he is thinking about a present. He then goes to google and searches for “Gift for mom” and google responds to his query with the following results.
These various websites will help him by answering the query.
So in this case Person was Sam and he was thinking about a present for his mom so he searched “gifts for his mom” on google and Google provided results to answer his query.
How GOOGLE works in simple words
↓
Step 1 → Step 2 → Step 3
Query/ Problem of a person –>
Searches for solution/answer ongoogle –>
Gets the Solution/Answer.
Now you have an understanding of how google works, right? Great! It’s time to jump into google ads.
After knowing how people use google and how it works it’s time to use that knowledge to generate some business from it.
For instance, if you are selling pain relief products you can use google ads to convert a customer by solving their problem.
This is Bobby. Bobby is suffering from back pain and wants relief from it. Now he will definitely see a doctor if the pain is severe but in most cases he could be facing it due to long office hours or any other reason.
The pain is not severe and he’s slightly feeling it but who wants to feel pain anyways? Even if it’s a minor one.
Now Bobby has a problem which is ‘back pain’. He wants a solution to it so he searches on google ‘how to get rid of back pain’
So now google results provide him solution like this:
As you can see google ads appear before the organic search results and Bobby is more likely to click on one of these and he’s likely to buy a product to get rid of his pain.
So what we are actually doing is “Solving Bobby’s problem with our products”
Step 1 → Step 2 → Conversion point Step 3
Query/ Problem of a person –>
Searches for solution/answer ongoogle –>
Your chance to provide the solution to their problems with your products or services.
Gets the Solution/Answer.
We’ve added one stop before step 3 which is “Conversion Point”. With google ads we are going to help people by solving their problems with our products and services.
The goal is to provide the solution before our prospect gets to step 3. To stop them at the conversion point and convert them as customers.
Now that you know how people search for problems/queries on Google to get a solution and you can provide solutions/answers to them with your products or services.
There’s one last thing left to discuss, which is how you can get on top of the google search results even before organic results. With google ads? Easy? Right? Yes, it is.
Google ads work like an auction, you bid on keywords to rank your ad on google.
Ad rank
Ad rank is combination of an advertiser’s keyword quality score and their bid
Keyword quality score : It’s mainly based on 3 factors.
Ad relevance – How relevant your ad is to the keywords someone searches.
Expected CTR (Click through rate) – How often people click on your ad when it appears on the results page.
Landing page experience – How often people bounce after clicking on your ad.
After you take care of the keyword quality score it’s time to bid on the keywords. Remember you are not alone in this, other businesses who deal in the same field as yours will be bidding on the keywords too.
That means you have to fight your way to get on the top in which ‘Bid and keyword quality score’ are your weapons.
If your keywords quality score is good and you bid higher than your competitors then chances are, you are going to rank on top. Google marks your keyword quality score out of 10. So 7 and above is considered a good keyword quality score.
There’s one important thing to keep in mind that google will only charge you when someone actually clicks on your ad. It doesn’t matter how many times your ad appears in search results, you won’t be charged anything unless someone clicks on it.
CPC : It stands for cost per click. You can decide how much you are willing to pay when someone clicks on your ad. It’s the amount you bid on your keyword.
If your ad’s keyword quality score is higher than your competitor, then google automatically lowers your CPC, In simple words, you don’t have to pay more than your competitors to rank your ad on top.
This was the simplest way to present how google ads work, Now if you want to know how to set up google ads campaigns and their benefits please head over to our this article.
What if you can reach quite 80% of the world’s internet users with your retargeting ads?
With Google display retargeting ads, you can reach that astounding number of people!
The Google Display Network (GDN) comprises 2 million+ sites, apps, and videos that reach numerous people, 80% of everyone within the world on the web , that your audiences and targeting options are just about limitless.
We’re going to show you ways to use Google display retargeting to extend brand awareness, boost sales, and drive registrations. With the bid optimization strategies, we’ll elaborate how it’s a budget-friendly Google Ads option.
What Is Google Display Retargeting?
Google display retargeting is used to show targeted ads across the Google Display Network to people that have shown interest in your brand (through visiting your site, apps, watching your videos etc).
How Does Google Display Retargeting Work?
Like any other retargeting campaigns, google display remarketing campaigns also work with the utilization of website tracking cookies.
Visitors to your site get a tracking cookie from a chunk of code embedded on your site. This code tracks their behavior and serves ads supporting that behavior.
Benefits of Google Display Retargeting
We already mentioned that retargeting helps you increase brand awareness, boost sales, and drive registrations, but let’s point out specific benefits.
Broad Reach
The Google Display Network allows you to reach people across 2 million+ websites and apps, also across devices.
Budget-Friendly
You can use real-time bidding to calculate the most effective bid possible for the person seeing your ad. This suggests that you’ll be creating high-converting retargeting campaigns that are cost-efficient.
Targeted Ad Campaigns
You can create new campaigns for specific audiences like, if you got plenty of cart abandoners? Create a remarketing list for cart abandoners and target them specifically!
Reporting
Google retargeting reports allow you to know exactly how your campaigns are performing and how much money you’re spending.
So, if you find that a campaign is not performing, you can remove it to improve the overall effectiveness of your marketing strategy and budget spent.
So, now that you know about the advantages, let’s create a Google display retargeting ad.
How to Create the Remarketing List for Google Display Retargeting Campaigns
There are two ways of creating the remarketing list for the display campaigns
Google Ads
Google Analytics
We’re aiming to cover both methods here. Still, we recommend the Google Analytics method because you’re not limited to making audiences based on visits, but can create an audience on just about anything from visitor behaviour or the website interactions.
Create Remarketing Lists in Google Analytics
Before you use a remarketing list from Google Analytics in a Google Ads campaign, you’ve got to link Google Analytics to Google Ads.
Fortunately, it’s very easy.
From your Google Ads account, click Tools >> Linked Accounts then Details under the Google Analytics section.
You’ll see an inventory of Google Analytics properties to which you’ve got access, also the status – linked or not.
To link a property, just click Link.
Now, let’s create a remarketing list in Google Analytics.
From the Google Analytics dashboard, click Admin. Then, in the Property column, click Audience Definition >> Audiences >> + New Audience.
There are different option to choose from the preconfigured audience definitions:
1. Smart List
2. Users who completed a transaction
3. Users who visited a specific section
4. New Users
5. Users who completed a goal conversion
6. Users who completed a transaction
7. All Users
8. Returning Users
Or, you can create a custom new audience definition or import the one.
Create a New Audience Definition
Click on Create New, to create a new audience definition.
As per my suggestion here are some useful audiences, you can create for your remarketing display campaigns.
High-Value Users
High-value users are users who have converted recently or frequently, and who engage in what you think about to be high-value conversions for your brand.
The goal of retargeting these users is to keep them engaged together with your brand and encourage new conversions by showing them 3 things:
a. New products that they’ll like based on previous purchases
b. Products they’ve seen but haven’t purchased
c. Products similar to products they’ve purchased
You can reach the audiences by using these 3 attributes.
a. Behavior
b. eCommerce
c. Date of First Session
Users Who Searched But Didn’t Convert
A user who searched your site and located something that matched their search, but ended up not converting for some reason is a superb retargeting candidate.
You can reach the audience using Conditions filters:
Users Who Abandoned Their Carts
With 80% of users abandoning carts, we just had to include them in our retargeting audiences.
You can reach your cart abandoners using these Conditions filters:
After you made your audience, choose where you want to save your audience.
You can save your audience to Google Analytics only, but as per my recommendation saving it to both Google Analytics and Google Ads. Now, it will be available for google ads when you want to create the display remarketing campaigns.
Create Remarketing Lists in Google AdWords
If you’d rather create your remarketing lists in Google AdWords, you’ll easily do this . Here’s how.
Log into AdWords and click on Tools >> Audience Manager (under Shared Library).
There will be 2 Tabs, Remarketing and Custom Audiences.
Click the + (Plus button) to make a brand new remarketing list. You will have some predefined options to create the new audiences.
*App users
*Website visitors
*Customer list
*YouTube users
*Custom combination
We’ll use Website visitors to make our remarketing list.
Enter a descriptive name for your list and choose the sort of visitors you’d like from List members.
From there, you’ll add as many rules as you would like to fine-tune your audience targeting before clicking Create Audience.
Set Up a Google Display Retargeting Campaign
Now that we’ve our remarketing lists created, we’re able to create a Google display retargeting campaign.
Start by signing into your Google Ads account.
Click Campaigns to bring up all of your existing campaigns, then click the + Plus button to make a brand new campaign.
Click on New Campaign and it will bring up a grid with different campaigns goals.
Select a goal (or create a campaign without a goal’s guidance) and click on Continue.
From the Campaign Type, select Display, and then Standard display campaign, also you have to add the URL of the website and then click continue.
Set the parameters of your campaign as you would like.
When you come to Audiences within the People section, you need to select the Browse tab. Now, click How they have interacted with your business, and find the remarketing list.
You can prefer to create your ads now or later (your campaign won’t run without ads), then click Create Campaign.
Conclusion:
The reason why visitors to your website don’t convert. These are some things you’ll never really know, needless to say. Maybe they became distracted and easily left. Maybe they didn’t just like the offer.
Maybe the offer was beyond their budget. Maybe they’re just browsing now, but decide to purchase in a few months. Regardless of the reason, retargeting/remarketing may be a good way to keep your business or brand at the front of their minds.
Keep giving them reminders and reasons to return back. Eventually, they might! Take advantage of this unique strategy to generate more leads, conversions and sales for your business.
Google has come up with exciting tools that have enabled businesses to try their hand at digital marketing. Unlike the times when marketing was only through expensive advertisements on traditional platforms, we have the option to expand our presence at different media platforms.
As we know the shopping campaign generates more than 70% revenue for the E-Commerce store. Today we are going to share some full proof of great and effective ways to boost the performance of shopping campaigns.
Let us divide the whole guide into sections. This will simplify the guide and let you understand in a much better way. This step-by-step guide will help you get all the answers regarding the Google shopping campaign, you will get to know about –
A) What is a shopping ad? How to set up a Shopping campaign?
B) How to Optimize shopping campaigns?
C) Tips to scaling the shopping campaign profitably.
What is a Shopping ad?
Even if you are still a beginner at learning the technical aspect of shopping ads, this guide will fasten your process to become the expert. Google Shopping is a comparison shopping engine, which is a service that permits retailers to advertise their products to searchers in a visually appealing way.
This means if someone searches for a product that you sell, Google will show relevant Shopping ads for your products, and those of your competitors.
If the user clicks on your ad, Google will take her right to the merchandise page.
Each Google Shopping ad includes a picture, the merchandise title, the price, the name of the retailer, and sometimes some retailer-specific information like shipping costs or reviews.
Google Shopping can be run in more than 40 countries. It’s not the sole comparison shopping engine, but far and away from the foremost popular one.
Types of Google Shopping Campaigns
There are 2 types of Google shopping campaigns we get to choose from in Google ads:
1.Standard Shopping Campaigns
2. Smart Shopping Campaigns
How To Setup a Standard Shopping Campaign?
Now, you will know how to set up a shopping campaign. We will tell you stepwise so that you will be able to understand easily.
Step 1: Click on the plus sign.
Step 2: Select [Sale] as a goal.
Step 3: Select Shopping as a campaign type.
Step 4: Select Standard shopping campaign option.
Step 5: Write Campaign name and select bidding option.
Step 6: Select the network on which you want to run ads.
Step 7: Select the location on which you want to run ads and click on save and continue.
What is Google Smart Shopping?
Here is a unique tool to make your ads smart and effective. Smart Shopping is one of the relatively new features in Google’s portfolio. It uses Google’s AI technology to optimize the Google Shopping campaign and maximize conversions and ROAS.
With Smart Shopping two things, a user has to choose are the target of the campaign and give a budget. The rest of the process is taken care of by AI. And what does AI do?
Smart Shopping automatically bids for us and displays the ads in several Google networks, which include Google Search Network, Display Network, YouTube, and Gmail. It also covers various types of ads like display ads, local inventory ads, and product shopping ads.
How does Smart Shopping work?
Also to regular Google Shopping Ads, a user must have access to Google Ads and Google Merchant Center accounts, load product feed data to Merchant Center account, select the country, and choose on a budget. There’s a further choice to choose the bidding strategy.
What’s different from regular Shopping Ads, is the automation. Google uses provided information to make a decision on what proportion to bid, also as where and when to display the ads. It happens because of its machine learning tools.
The goal is to realize the simplest possible conversion rate while reaching the chosen target. Google tries to accumulate as many potential customers as possible. It aims to seek out the audience that’s wanting to spend more.
Google Smart Shopping vs. Google Shopping Ads
These are the main differences between Google smart shopping and Google shopping ads. It will help you to decide if you can go with Google smart shopping or not.
Google Smart Shopping
Google Standard Shopping
Quick and highly automated
Full control over the campaign
Easy to set up
Manual and complex
Saves a lot of time
Very time consuming
Limited device and location targeting
Full device and location targeting control
A broad range of ad types
Demands experience knowledge
Exposure in many networks
Possibility to choose networks
No possibility to use negative keywords
Possibility to use negative keywords
No Bid adjustments
Bid adjustments
No granular data analytics
Granular data analytics
How to set up Google Smart Shopping?
Before activating Smart Shopping, confirm to suit Google requirements with regards to the present tool. The foremost important ones say that you simply got to set up conversion tracking and add a global site tag to your website. aside from that, the standard conditions and policies for Google Shopping must be met.
1. Once you do the above, create a brand new campaign in Google Ads.
2. Select the goal if you wish to (Sales, Leads, Website traffic, etc. )
3. Choose smart Shopping as a Campaign type
4. You have to select a smart shopping campaign
5. Insert the budget value
6. You’ll also choose the Smart bidding target
7. Perform the standard steps, like adding the name, uploading the merchandise feed, selecting a country.
8. Click Save and it’s ready.
Remember that Google Smart Shopping campaign features a priority over a standard Google Shopping campaign.
So if you are also running the standard shopping campaigns with smart shopping campaigns, Google will give the priority to smart shopping campaigns to display the ads.
So it is advisable to pause the standard shopping campaigns when using smart shopping campaigns.
How to optimize the shopping campaign?
Now, we are sharing 100% accurate and resulting tips to optimize the shopping campaigns. You can use these strategies to make the shopping campaigns effective, affordable and target oriented.
A) By using proper custom labeling –
Custom labeling is a type of tag that you can use to filter and group the products in the Google Ads campaigns.
Before we understand how to use custom labeling in google shopping, you have to be clear of why you need to use custom labeling.
Why you need custom labeling?
Grouping specific category products together.
Better overview of your performance campaigns.
Finding the sweet spots products.
Better control over the campaigns.
You can higher bid on fast selling products and lower the bid on slow-selling products.
You can apply custom labels according to the group and set different bids based on different product groupings in the ads campaigns.
Custom labeling is an easy way to organize your products. Custom labels have 5 empty boxes where you can add your data or value according to your requirements. Custom labeling starts from 0 and ends with 4.
Easy ways to use custom labeling
Based on seasonality – spring, summer, and winter season.
based on profit margin – Long sleeve shirts and jeans have a high margin product.
Basis of high performing products – leather shoes (high selling products).
Or
You can use custom labeling according to the product category like – Socks, Shoes, jeans, and Shirts, etc.
Custom labeling is a simple and quick way to organize your shopping campaign. Below are some cases where you can use custom labels accordingly:
Case 1- you can label your products based on the high, medium, and low-profit margin and adjust bids accordingly on it.
Like you can use custom label 0- profit margin according to low, medium, and high-profit margin items.
Case 2- You can adjust the bids based on product pricing. Also, you can assign higher bids on the most expensive items and lower the bids on less expensive items.
You can use custom label 1 -price categories like under $25, under $40, and under $70.
Case 3- You can show your products based on the seasonality base. Show the right products based on the season. Like shows woolen clothes in winters.
Here you can use Custom label 2- seasonal base according to Spring, summer, and winter.
Case 4- Sales item and free shipping
You can use a custom label based on a free shipping product and have to find which products are most interested in and then custom label on those items.
Here, you have more chances to convert on those items.
You can use Custom label- 3 shipping or free shipping.
You can use all custom labels at once if you want.
For example –
First, you analyze your product data. After analyzing you find out that your highest performing item is short sleeves men’s category under the range of $30 to $50 plan shirts. Now you can custom label these categories.
Custom Label 0 – Men’s Tee
Custom Label 1 – Short Sleeve Shirt
Custom Label 2 – Summer
Custom Label 3 – under $30 to $50
Custom Label 4 – Plain Shirt
Now you have to set up a campaign based on these custom labeling. Because you know that this category item is performing very well.
Now, you have to set up a simple shopping campaign and only run these custom labeling category items and exclude all products.
Google gives you an option to filter the product based on a brand name, product type, google product category, and condition value, etc.
After assigning all custom labeling you can use the custom label in your shopping campaigns.
You can use the custom labels in Google shopping in two ways. The first way, you click on campaigns then go the settings tab and click on the inventory section where you can use custom labels according to your requirements.
The second option is to click on the campaign and then click on specific ad groups, now click on the plus button in front of all product tabs. Here you can select your custom labels according to your need.
B) By Finding Negative Keywords –
As we know, search ads campaign and shopping ads campaign 90% success depends upon how many keywords we will put in negative keywords?
Have you asked yourself why we find negative keywords? If not, that is very important to know about this question before doing finding negative keywords.
What are negative keywords? Why do we find negative keywords?
Search terms that are not relevant to our ads, landing page and service that we are offering. These search terms we can call negative keywords.
It is important to find negative keywords because by finding negative keywords, we closed the door for the irrelevant search term. So, due to this more and more relevant search terms will come that increases a chance for conversion.
So, hope you understand why we find negative keywords. The negative keywords work well and help to make the entire marketing strategy a success.
Best Ways To Finding Negative Keywords
Now, the next question arises “ How can we find the right negative keywords?
Here, we share our 3 best steps to find negative keywords that help us in boosting the performance of the client’s project.
Step – 1 First Step ( Understand your product properly)
Firstly understand your product properly; as it is important to understand your productivity to find the right negative keywords.
The main question is “ what things you should consider while understanding the product, find as below:
a. Product category b. Product qualities c. Product usage d. Who can buy that product?
Below you can see the product image, detail, specification etc.
The point that has to note:-
a.) Product used to move heavy furniture
b.) furniture lifter and roller
c.) Pad slider
d.) Made of plastic and have PVC handle
e.) Price $49.9
f.) Discount 50% off
Step-2 (Understand keyword search terms)
After proper understanding of the product, you have to understand search terms.
Put the search term into a negative keyword list that is not relevant to the above-noted points of the product.
Above image is showing negative keywords:-
-lifting dolly -safe mover dolly -machinery dolly -Lifting heavy aquarium
Find this type of negative keywords from the search term and then put them into a negative keyword list.
Step – 3 (competitive analysis)
There are many search terms that are relevant but unable to be converted into leads.
So, this type of search term is also important to put in a negative keyword list.
For example:- One search term we found “ heavy furniture lifter “ that takes $36 cost with zero conversion. Then we searched that term on Google and found that the same product is dealing with low prices here and also some companies offer free shipping here.
So, on this search term, we will not get any conversion until we set the lowest price and give any other offer. So, put this search term into a negative keyword.
By conducting these three steps you will find 100% negative keywords. That will automatically boost your campaign performance by coming from the relevant customer.
Hope, you will know about “ how to find negative keywords ? “ in an efficient manner.
C) By Extracting Out Non Performing products –
Firstly set up a shopping campaign with proper custom labelling on the basis of profit margin, category & on the basis of product price.
After that you will see that there are some products that are not running good. In this case you can optimise your campaign by pausing non performing products from existing campaigns & create a new campaign to run this product.
“ Note that – you have to setup one ad group for one product”
After creating a single product ad group now you can easily optimize the search term by finding negative keywords. So that irrelevant clicks are skipped and only relevant clicks are counted that increase the chance of getting converted.
D) By changing bid strategy –
There are many bid strategy with the help of these you can optimize you campaign –
Target CPA – Target CPA bidding is a bidding strategy you can use if you want to optimize conversions. With this method, Google Ads will automatically set your bids on each campaign based on your CPA. While some conversions may cost more, others may cost less to even out and align with your acquisition costs.
Target ROAS – Target ROAS is the bidding strategy where Google Ads will set your bids to maximize conversion value based on the return you want from your ad spend.
Maximise Conversion – Using the maximum daily budget that you set, Google will automatically run your bidding for you to get you the most conversions for your money.
Enhanced Cost Per Click – Google has the right to increase or decrease your bid amount based on the likelihood of driving the sale.
Maximise Clicks – Google Ads will attempt to drive the most clicks possible with your daily budget.
Manual CPC – Manual CPC is where you set bids for different ad groups or placements on your own. If specific campaigns are more profitable than others, you can quickly adjust budgets to add money or remove from other campaigns.
E) Product Title and Description Optimization –
Since you can’t target keywords directly, include them in the product titles & description to get most people clicking on your product you need to do complete keyword research first before proceeding.
CASE STUDY OF SHOPPING CAMPAIGN
Here, you are seeing the screenshot of google ads account. In which we are giving to our client 10x ROAS from the shopping campaign.
We at ROI Minds have implemented a winning formula that works and magnifies the results. Here are our plannings and strategies made by ROI Minds to increase the ROI of your Google Shopping campaigns:
1. Make sure campaigns are segregated properly based on product value, margins, and promotions.
Before creating a campaign, you need to know what you’re trying to accomplish. This includes sketching your goals and preparing what you’ll need to carry out your campaign, like a landing page, an AdWords budget and more.
The first goal you need to set for your new campaign is what progress and success look like. It could be anything from assigning an order to access their email address to join your email list.
If you have infinite goals, then you must write them all down. Every ad group should focus on only one goal. When you have many goals, you need multiple ad groups in your campaign.
2. Make campaigns and product groups as granular as possible to simplify the bidding and testing process for the budget and impression share.
The bidding procedure you choose depends on your initial campaign goal. If your aim is to make more trades and sales for your E-commerce store, “Maximize Conversions” is the way to perform. AdWords will show your ads to people more inclined to buy, based on factual data.
If your aim is to drive traffic to your site, you want to maximize for clicks alternatively. This will optimize your campaign for the tremendous number of clicks, rather than focus on whether users regenerate or not.
Set Your Budget
You wouldn’t originate any other marketing initiative without a budget in mind. Possessing a particular number in mind is crucial before you even log in to AdWords.
Without one, you’ll bankrupt your budget in no time. AdWords works on a regular budget basis. To discover the daily budget to use for your campaign, figure out your entire monthly ad spend budget, then divide that by 30.
Make sure this is a practical budget to achieve your goals. Having a $100 monthly budget with a goal of making 50 sales of a $10,000 product isn’t going to skip it.
3. Utilize promotion feed from the Google merchant account to get the additional competitive advantage.
The online shopping space is more boisterous than ever and you would clearly be questioning how you can make your ads stand out so people visit your landing page instead of your competitor’s one.
Google Shopping gives a solution for you to show your promotions within your Product Listing Ads, so they will really stand out from contenders. Merchant Promotions are designated in shopping ads with footnotes which trigger a pop-up with supplementary details and a “Shop” button. They proved to significantly enhance CTR and ultimately Conversion Rate, Revenue, and ROI.
Google Merchant Promotions also allows you to determine your discount to a comprehensive audience at no added cost, securing the best ad placement you would ever think of the very top of the Google Search Result Page.
In fact, unlike regular search ads, Shopping Ads regularly appear at the top of the SERP (Search Engine Result Page) and are one of the most noticeable elements on the page.
4. Identify top performing products and set up them in the individual campaigns with a dedicated budget and high-priority settings to acquire at least 60% search Impression share
Many times instances have been seen where clients pause keywords because they aren’t creating click or impression volume. While pausing is unquestionably one method for acting on low-performing keywords, we typically recommend pausing only as a last option.
There is everything to consider when it comes to diagnosing why a keyword isn’t generating volume, and one often overlooked, yet illuminating metric is
Impression share
Impression share is the number of impressions you have received divided by the predicted number of impressions you were eligible to receive. Worth is based on your current ads’ targeting settings, endorsement statuses, bids, and Quality Scores. You can survey, impression share data at the campaign, ad group and keyword levels.
5. Use Product Ratings, Seller ratings
Have you ever inquired how to get the stars on your Google Adwords ads? A desire to efficiently boost conversions and beat your contestants? Google has now made it a lot more manageable to get the stars.
Before you had to do all kinds of assimilation into your Google Base or Google merchant account, but not anymore. Now what Google does is license out to 32 autonomous 3rd party review companies.
These companies are allowed by Google and the stars are normally the ones that you see in Adwords CPC TEXT ads or your Google Shopping ads (PLAs).
Not solely will the star ratings show in your Google Adwords, but they will show in Bing Ads/Yahoo BTW, BingAds controls Yahoo PPC. These merchant rating stars will work for both service-based companies and eCommerce websites.
6. Make sure to use custom labels on every possible product for the segmentation
With Shopping campaigns, you can use design labels when you want to divide the products in your campaign using values of your selection. For example, you can use custom labels to indicate that products are periodical, on clearance, best sellers, etc. These values can then be elected to use for monitoring, reporting, and bidding in your Shopping campaign.
Campaign precedence is also beneficial when you’re advertising the same product, for the same country, in various Shopping campaigns. To use the campaign priority setting, you first need to generate a Shopping campaign.
But always remember that campaign priority is only necessary if you have multiple Shopping campaigns that promote the same product. Campaign priority is not agreeable with showcase Shopping ads.
7. Make product groups based on the themes and profits
AdWords keyword grouping is a surveyed part of the AdWords workflow. Not everyone understands that creating parsimonious, better-organized ads groups in your AdWords account can have a big positive effect on your overall report performance.
That’s because well-organized keyword accumulations improve your account’s significance, which raises your Essence Score and lowers your cost per click.
Dramatically grouping and classifying your keywords to improve your PPC strategies by enabling you to create:
More Quality–Score-friendly ad groups
More relevant text ads
More effective landing pages that drive more conversions
While you segment your keywords, PPC campaigns are more prosperous and cost-effective from end to end.
8. Use Google Merchant automatic rules to avoid unnecessary product disapproval
After your promotion feed and commodities feed are concocted, Google evaluates and validates your promotions before administering them. This process is typically finished within 12 hours but can take up to 24 hours.
We at ROI Minds suggest you avoid unnecessary product disapprovals and submit your promotions as early as possible for a timely review.
The approval process requires 2 steps:
1. Custom review: The custom review strengthens the progression following all editorial obligations and program strategies and will occur quickly after a promotion is tendered during workday business hours.
2. Validation review: When a promotion becomes engaged on your site, Google testers will confirm that the promotion works and that it follows all program policies.
9. Manual ECPC and gradually set to CPA bidding strategy by starting campaigns
Enhanced cost-per-click (ECPC) aids you to get more progress from manual bidding. ECPC runs by automatically adjusting your manual bids for clicks that resemble more or less likely to lead to a sale or exchange on your website.
Unlike Target CPA, which automatically sets bids based on your destination cost-per-conversion, ECPC is restrained by your max CPC bids when optimizing for conversions.
For exploration and exposure campaigns, ECPC benefits in increasing conversions while attempting to keep your cost-per-conversion identical as you are receiving with manual bidding. For Shopping, ECPC helps in increasing conversions while striving to maintain your same overall spend.
If you want to use Enhanced CPC with Search or Shopping campaigns, you’ll need to set up conversion tracking also you don’t need conversion tracking to use ECPC with display campaigns, but conversions will help you see whether your ads are capable and effective or not.
10. Ensure to identify as much as possible from everything else in the product group.
Creating your account enables you to entirely serve the right ads to the right customers, and it also enables you to thoroughly track the effectiveness of your advertising efforts.
When people are scrutinizing online and they type a word or phrase, they are probably looking for information that’s intimately tied to those words. For example, if Varun types a digital watch and he sees an ad for film reels, he will probably not click the ad.
To show ads that are appropriate and applicable to the searches of people you are trying to reach, bundle and gather your related ads together with related keywords into an ad group. By using this way, all of your related ads would be displayed to customers searching for related things.
11. Keep updating your negative keywords list.
If there are some kind of search terms that give you undesired impressions or clicks across various campaigns, you can create a negative keyword list that includes those terms, then apply the list to appropriate campaigns.
This way you won’t have to manually add the related negative keywords to a particular campaign, and you can more efficiently manage future changes to negative keywords across campaigns.
To build and update a negative keyword list, you would have to think of concepts and words that you don’t want triggering your ads. You can use the search terms outline to get ideas.
You may also want to prepare these words by themes, such as the different products or services you offer. You can also add up more than 4000 negative keywords per list, and create more than 15 negative keyword lists in your account.
Once you have created and updated your negative keyword list, you can apply the list to various campaigns at once. Later, if you need to add a new negative keyword to those equivalent campaigns, you can just add it to the negative keyword list, and the change applies to all campaigns that share the list.
12. Run (RLSA) Remarketing lists for search ads campaigns for the most common search terms.
Remarketing lists for search ads (RLSA) is a Google AdWords characteristic that enables advertisers to tailor their search campaigns based on whether a user has earlier visited their website (or app), and the pages that user surveyed.
RLSAs Remarketing lists for search ads can be used in two ways:
1. Initiating bid modifications on your ad groups for users (remarketing lists) who are exploring on Google using the keywords you are bidding on.
2. Set up search ad groups to only be triggered and display ads if a user is on your Remarketing list, and is searching with the keywords you are bidding on.
RLSA shows ads only to users who have already visited a page on your website. With the following strategies, you can make it possible:
1. Make the most of a very small ad spend.
2. Bid on more universal terms, but only for the most qualified users.
By using RLSAs, you can elect to only have your search ads shown to users who have already visited your site.
This means your small budget will last a lot longer than on conventional search ads because the users seeing your ads are probably a more qualified audience as they must already be aware of your brand and have previously visited your site.
13. Running Dynamic Remarketing campaign to get sales.
Remarketing empowers you to show ads to people who have already visited your website or used your mobile application. Dynamic remarketing drives this a step further, letting you show former visitors ads that carry products and services they viewed on your site. With messages tailored to your audience, dynamic remarketing helps you create leads and sales by conducting previous visitors back to your site to accomplish and complete what they started.
More reasons to use dynamic remarketing are:
Ads that scale with your products or services: Pair your feed of products or services with dynamic ads, scaling your ads to meet your entire catalog.
Simple, yet powerful feeds: Create a basic .cvb, .tdv, .xas, or .xhsxx feed. The Google Ads product suggestion engine will pull products and assistance from your feed, discovering the best mix of products for each ad based on popularity and what the visitor inspected on your site.
High-performance layouts: Google Ads prognosticates which dynamic ad layout is likely to function best for the person, placement, and platform where the ad will show.
Real-time bid optimization: With heightened CPC and translation optimizer, Google Ads determines the optimal bid for each impression.
14. Don’t forget to optimize your product Feed Title, Descriptions
Your product data moulds the way your ads behave and work on Google Shopping. To make your Shopping campaigns as prosperous as possible, you need to provide and maintain high-quality product data.
*Map out your customer journey from Shopping ad to check out. Acknowledge opportunities that will build a better shopping occurrence, such as enhancements to your product data, landing page, and checkout process.
Consumers are more likely to obtain if they can immediately find what they want to buy if they can use rich content to help them make an implicated decision and if they can execute the transaction in just a few steps.
*Prioritize your most relevant products when designating resources. Concentrate on products that have the most influence on your performance. Make sure you give complete product data and fix any significant issues for those products.
*Run experiments to distinguish optimization techniques that are most effective for your products and target audience. For example, try attaching a color to your garments product titles and measure the change in your key administration metrics. Test different tactics to discover what will drive results for your business.
*Take advantage of opportunities to distinguish your ads with Merchant Promotions, Product Ratings, Customer Reviews, and Local Inventory Ads. Highlight your unique offers and value declarations to set your Shopping ads apart from your contestants’.
This guide would have made you aware of the much popular digital platform now. This is a great start to making your products globally visible. You can implement these steps to create your own shopping campaigns and optimize them to enable sales growth and maximizing profit.
A bidding strategy could be a campaign with a particular focus, hooked in to a two primary criterias:
Campaigns Network Targeting (Display or Search)
Your focus: clicks, impressions, conversions or views
The idea behind these strategies is that they assist you to accomplish specific goals looking at what your target market is. You’ll use them to urge a better click rate, making a far better impression, or increasing your conversions.
There are a spread of various bidding strategies available for you to use, and it’s important that you just understand all of your options in order that you’ll choose the one that’s best for you.
Different types of bidding strategies:
1. Target CPA (Cost Per Acquisition)
If you would like to optimize your conversions, then this might be the answer for you. This sort of strategy will specialise in trying to make more conversions at a selected acquisition cost.
Google Ads will automatically set your bids to support your average CPA. If you don’t know your acquisition costs, then this might be a drag. Your CPA is the amount of cash that you simply can afford to spend on one customer.
2. Target ROAS (Return On Ad Spend)
Google Ads will set your bids to maximise conversion value based on the return that you simply are trying to find from your ad spend. It involves a touch of maths to figure out, but if you get there, then it is often quite helpful.
You calculate a Target ROAS like so:
(Sales ÷ ad spend) x 100
You can even use previous campaigns to assist you opt what your percentage should be if you aren’t sure.
3. Target Impression Share Bidding
Target Impression Share Bidding is one among the newer bidding strategies around. It was replaced by Target Search Page Location & Target Outranking Share in June 2019. Advertisers can set a goal impression share percentage, just like for a target CPA. You have 3 options for ad placements:
Absolute top of the page
Anywhere on the page
Top of the page
Google will then adjust the bids according to this.
4. Maximize Clicks
Maximizing Clicks is an automatic strategy that sets your bids to induce as many clicks as it can within your specified budget. It’s arguably the best way to gain clicks, as Google Ads does most of the work. What’s more, you don’t have to be compelled to set bid amounts for your ad groups, keywords or placements.
5. Manual CPC Bidding
If you’d like better to do things manually, there’s Manual CPC Bidding. This strategy allows you to line your own maximum CPC.
If you use this sort of bidding, you get complete control over all of your bids, and you’ll set the utmost amount that you simply could pay money for each click on any of your ads. It gives you a level of control that you simply can’t get through automated systems.
6. Enhanced Cost Per Click (ECPC)
ECPC is a partially automated strategy that works by automatically adjusting the bids, as per google the bid can be raised by 200% if there are any chances of conversions.
The strategy relies on clicks and their probability of resulting in a purchase or conversion. ECPC tries to keep your average CPC below the max that you simply have set, and it works best when including conversion tracking.
7. CPM Bidding (Cost Per Thousand Impressions)
This Bidding Strategy is for Impressions. YouTube campaigns like TrueView and Display Network are the only things that this feature can help. You can’t use it on a search Network because it is a display only bid strategy.
8. vCPM Bidding (Cost Per Viewable Thousand Impressions)
This Bid strategy is a manual display-only bid strategy. It lets advertisers bid for impressions when your ad is shown. It is a good option if you’re trying for brand awareness and you would like people to see your ads message, this is a good option that supports viewability.
Google will aim to maximise the amount of viewable impressions your ad receives, which works best with a finite audience.
Viewable CPM (vCPM) means that you only pay for ads when they’re seen on the Google display network.
9. CPV Bidding (Cost Per View)
You will pay money for video views and other video interactions once you use this sort of bid. This will be the amount that you will pay for the views for your video ads. CPV bids will get you changed for all the clicks on the video that take the visitors to your business website.
To do this, you enter the maximum that you simply want to pay per view for your ad group in a video campaign. The max bid then applies to all ads within the group.
Conclusion:
As you can see, there are so many bidding strategies that you can use to scale up your marketing with Google ads. Each strategy has its advantages and disadvantages, and it depends upon what you’re willing to achieve and which bidding strategy you should choose.
Take some time and look through all of the choices to offer yourself the best chance of success. These only work well once they are evaluated and chosen wisely.
Bidding strategies are not a one fit solution for all, so ensure that you’re optimizing them frequently to make sure they are still getting you the same results as they are giving in the beginning.
For a successful PPC campaign, best keywords research is most important. You have to select a bunch of keywords which are most likely to convert. Consider keywords research mix of science and art.
Before doing keywords research you have to understand your customer or users and find out which search terms they will use to search your product and service. By doing so, you can assure yourself that your ads will appear at the right time and in the right place.
From our PCC keywords research Guide, you’ll learn how to acquire, refine, and group your PPC keywords, so that you will get more targeted and more effective pay-per-click campaigns.
Get ready for some brainstorming around keywords and its types:
Before starting the keywords research you should scan through all your website landing pages to which you wanted to send traffic. You should take out all your relevant keywords from these landing pages. It will help you to take out a handful of relevant keywords that will be directly related to your product and service.
Now you can organized your keywords in the following types:
Brand Search terms – any search terms will contain your brand name and trademarked.
Generic Search terms – any search terms related to products or services offered.
Related Search terms – this search term is not directly related to your product and service, but the user might be searching for your product.
Competitor Search terms – search terms contain brand names of competitors who are offering similar products and services to yours.
Let’s have some examples for the above mentioned types. For instance, I wanted to set up the campaign to advertise Nike running shoes, then my list of keywords looks like this:
Here is a Note:
Before Bidding on a competitor’s brand search terms you should know that it will usually be expensive and will consume most of your budget. So before targeting the competitor search you should have a comfortable cushion of budget to play around the competitor. Therefore, think carefully on ROI whether it’s worth it or not.
More Tips Around Keyword Brainstorming:
Think about User Behaviour: You should have to brainstorm around what queries and words they will use in search to bring them your website?
Start with a broader keyword, and move to more specific keywords. For example:
You should include keywords with product variations and synonyms in your list.
Search engines are smarter, they can automatically make connections between related search terms like between “sneakers” and “running shoes”, but it doesn’t happen always, so it’s best to include them in your keyword list, especially when you’re planning to add your keywords as an exact match type. Same do this for plurals keywords, abbreviations and short forms of keywords.
Taking the keyword “women’s pink running shoes” from above, I would probably jot down variations like:
Women’s pink running shoes
Women’s pink running shoe
Women’s pink running boot
Women pink running shoes
Women pink running shoe
Women pink light shoe
Women running shoe
While selecting keywords consider specificity:
For some of us, it can be effective to include “head” terms or broad terms like single words because they have higher search volume – but Head term like “shoes” could be used by people searching for women’s shoes, kid’s shoes, men’s shoes, and so on, so your product might be not relevant to them.
On the other side, using long-tail keyword phrases like “men’s black running shoes” might only get a few searches per month, but users are more likely or prefer to click your ad and proceed toward purchase because your product is exactly what the user is searching for.
There is an additional bonus of using long-tail keywords is that they are less competitive and therefore they are less costly.
Add keywords related to product or service:
By adding related keywords, it will help you to attract the buyer who will be more likely to be interested in your product and service which you are selling.
Let’s take an example if you are selling cat food you could include keywords that cat owners would search for, such as cat grooming, cat breeds, cat health issues, cat sitters, cat accessories, and so on.
Use a method called “concatenation”
Here is the one more tip to quickly expand keyword lists by merging columns of words together using online tools like merge words.
Like in the example below we have put the product keyword in the third column, and in the first column we add product type and a second column we add product colour, and then the tool will generate a list of all possible permutations of those nine terms.
Search engines are smarter they understand longer search strings:
Now searches over voice are growing. People prefer Voice led queries by speaking questions into their mobile phones to search for things on the go. So we also have to add these search terms into your list of keywords.
These search terms are like traditional keyword search query might be “Chinese eatery Delhi” but someone searching on a phone might say “what’s the best Chinese eatery in Delhi?” or “where can I get Chinese food in Delhi?”
Expand and Refine Your Keyword by using Tools
After making your list of seed keywords, your next step is to utilise the keyword research tools to determine which keywords to keep and to drop.
With your seed keywords list you cannot go with your guts – keyword tools will help you to get the terms that people are actually searching on search engines.
There are many tools available that will give you insights into how popular certain keywords are, from Google’s Keyword Planner to other free Keyword Suggestion Tools.
Each keyword research tool is a little different, but the main thing that you have to look for is keyword search volume. You can see higher the keyword search volume, the more people are searching for that given keywords per month.
In Google Ads Keyword Planner you can also check the “Competition” column with Competition ranking in terms of high, medium, or low. The higher the competition means more advertisers are bidding on these keywords and you have to pay more to compete for top positions.
Keywords with high Search volume and low-competition are the sweet spot:
You should look for the keywords which are higher search volume but low competition. It will give you substantial traffic without costing you high.
Keyword tools like Google Keyword Planner suggest additional keyword ideas that you missed in your initial stage. There are some other free keywords research tools also available like Ubersuggest and Soovle can also help with this as well.
Keywords which have low search volume, with high competition, will drain your budget so quickly, so drop them from your list.
Selecting and Grouping Your PPC Keywords
Now you have selected some impressive keyword lists. Now you have to sort your keywords into targeted groups that are closely related to each other. These keyword groupings correspond to your ad groups in Google Ads (or Bing Ads, etc.).
Here the keyword grouping tip is to group the keywords as per the structure of your website. For example, if you’re selling cat food, your campaign might look something like this:
Brand – Purina Cat Food
Brand – IAMS Cat Food
Brand – Royal Cat Food
Generic – Cat Food
Generic – Cat Food – Chicken
Generic – Cat Food – Beef
Generic – Cat Food – Kibble
Generic – Kitten Food
If your ad groups are more focused then it will be easier to:
Measure the performance of each keyword
Prune or expand your keywords lists if necessary
Create highly relevant and keywords specific ads
Well-organized ad groups and campaigns will have more relevance, and higher relevance keywords will have higher quality scores, it will increase your ad rankings and reduce what you pay for each click and each conversion. Healthy PPC accounts will always have healthy quality scores, and strong keyword organization will improve your overall scores.
Also Search for Negative Keywords
After creating your keyword list, now you also have to add negative keywords. These are the terms for which you don’t want your ads to show up for. Adding negative is an important part of a successful campaign. It will help you to control your costs and keep your ad targeting as relevant as possible.
The main purpose of adding a negative keyword is that it will prevent your ads from triggering for some irrelevant terms that are not related to your business.
Let’s take an example: a seller of high-end appliances or decor would want to target affluent customers so they will add terms like “cheap” and “free” to their negative keyword list to prevent their ads from appearing for those search terms.
One more reason for adding the negative is that you have to rule out impressions on terms that are not related to your business – like “hair dryer” is your negative term when you are selling home appliances including washers and dryers.
Some tips to finding out negative keywords for your campaigns:
Always go through your search query reports: You have to go through words in your search query report and find out some of the words which might not be a good fit for your account, add them as negatives so that you save yourself from extra spend.
Which Match types for Negative: If you assign the wrong match type to your negative keywords then it might also block your potential traffic. So first thing to do is that you should add a negative with a broad match to disqualify any query that contains your negative term, such as “free.” Use phrase match and exact match negatives to disqualify more specific search terms.
Add a Negative Keyword before the campaign launch. The more negatives you set before a campaign launch, it will help you to save the more budget beforehand. You can add negative while researching for your keywords from the keyword suggestion from tools.
Add Multi-Level Negatives: There are some negatives that are good fits across multiple ad groups or campaigns you can add it to all.
Don’t Overload the Campaign with Negatives! Now you know that negatives are an important aspect of a successful PPC campaign, it will help you to save your budget. But if you excessively added the negative in your campaign then it will hurt your account performance by killing your impression and clicks. While adding the negative you should assure yourself that these searchers are highly unlikely to convert.
Last thing is that you should keep going with your keywords research! Because You’re not going to discover every keyword in PPC in the first go. Therefore you should give 15% of your PPC management time to PPC keyword research.
It is ideal if you are doing keyword research every week like adding new keywords and testing new match types and adding new negatives. Over a period of time, your account will become stronger and more relevant by practicing the same.
Google Ads, formerly known as Adwords, is probably one of the most successful methods to drive qualified traffic to your business whenever they are looking for acquiring products or services.
It allows you to make and offer all coordinated ads through which your business will appear on the search results page when your optimal clients are searching for items and services like yours through Google Search or Google Maps. This is how you reach your intended audience when it makes sense for them to come across your ads.
Google Ads will help you analyze and make required changes in your ads to reach more people to help you achieve all your business goals.
What is Ad Reach
The estimated number of people in a targeted area is known as Ad Reach. It is calculated by the number of signed-in users. You are provided with an estimated number of people that will see your ad in a given area.
You can use those estimates to choose whether you’ve focused on the correct regions, or if you should choose different areas that may benefit you.
Note that the reach will only help you in giving an estimate number about how many people could potentially see your ads. It would not help you in estimating the number of impressions your ad will receive.
Ad Reach depends on an estimated number of individuals seen on Google properties (properties that are linked to Google in any way) inside the predetermined geographic territory.
Consequently, you may find that reach numbers in Google Ads may have a difference from time-to-time. It is mostly due to the factors that include:
Total number of Google accounts used per individual
Total number of temporary visitors to a specific location
How much time each user has been spending on a website
Types of Ad Reach
The purpose for analyzing your reach and frequency data is to give a better understanding of the number of times your ads were shown to people for Display and Video campaigns.
Unique Reach and Cookie-based Reach are the two reach metrics that are used to help you with providing a clear image of how you are meeting your reach goals.
Unique reach metrics measure the total number of individuals who were indicated an ad. These metrics go past fundamental cookie measurements to assist you with understanding how frequently people were shown your ads across various gadgets, formats, etc.
You can also view cookie-based reach metrics along-with the unique reach metrics. Cookies provide us with estimated reach due to the fact that they are able to distinguish between different web browsers. A number of cookies are counted by Google Ads have been served an ad or recorded a click on an ad to calculate cookie-based reach.
Conclusion:
Ad Reach in Google Ads is an important metric that will help you determine the audience that is most likely to see your ads. The estimated figures of the total number of people in a selected geographic area are provided by ad reach.
This enables you to have a rough idea of your ad impressions. In the coming few days Google Ads will completely replace cookie-based reach with unique reach as the primary method for ad reach measurement.
eCommerce business owners are always looking for opportunities to increase the conversion rate that helps to grow their business. Here most valuable tips for increasing the conversion rate for your site.
What Is a Conversion Rate:
Before proceeding you must understand what is a conversion rate and what is the average conversion rating that occurs in eCommerce sites? Basically, the conversion rate is defined as the percentage of users that visit your site and complete the desired action. For example, if you had 25 conversions from 1,000 visitors, your conversion rate would be 2.5%.
The average conversion rate on the eCommerce website is 1% to 2% but it totally depends on traffic quality.
Here, take a read of 5 minutes to know how to improve the conversion rate of your website.
1. High-Quality Image: When you sell something online, users can’t touch your products so it’s essential your images should be attractive and should provide detailed information. Use multiple images for each product so users can check the product from every angle.
2. Product description: Product description matters a lot as it provides all the required information to users that they want to know before buying any product. Concise product information always contains the points mentioned below:
Who the product is for
What it will do
Why it’s good
3 Product videos: Along with the product images, a video also plays a vital role to improve the conversion rate because a video is the best source to show how you can use products and what is the end result you will get.
4. Free Shipping Offer: According to marketing research 80% of users expect free shipping. If you don’t offer free shipping then there are higher chances to lose customers. Keep in mind free shipping is a psychological game. When a user doesn’t find a free shipping offer on your website they go on other sites to buy products.
5. Create Urgency: When users see any limited time offer on your website or some other type of urgency, it helps to take quick action from the user end without any distraction. It will help to boost your conversion rate.
6. Keep Competitively Price: When users buy any products they consider the product price a lot. They check the same product on different websites to compare product prices and complete USP. In the shopping ads, product price is visible along with the rest of the detail so it’s impacting the clicks through its rate too.
7. Reduce ACT Abandonment: ACT stands for add to cart, if you have a high rate of ACT abandonment, it means you are losing a customer who wants to buy your products. Below mentioned are the main reasons for the high ACT abandonment:
High product price
Shipping cost
The too long and unconventional checkout process
Slow website loading speed
Asking too much of details
8. Concise Website Structure: Make sure your website structure should be very easy and clear that helps users to find any product without any hassle. In this era, every industry is full of competition so if any user will have trouble finding products on your website they will leave and go on another site.
9. Customers Review: A majority of the customers want to see reviews before buying any products. New customers are always curious to know what existing buyers are saying about the products. If you have a good review of the product it helps to boost the conversions rate.
10. Optimize for Mobile Devices: With the advent of technology, 70% of the customers use the internet on their mobile device and if your website doesn’t provide a great experience with mobile usage you’re missing a large number of sales. So make sure your website is working fine on mobile devices.
Conclusion:
I hope these tips will help you to boost your eCommerce website’s conversion rate and make sure you don’t miss anything while creating your eCommerce online store. Meanwhile, in shopping ads do proper product segregation, target your potential customers, refine traffic quality, and optimize your product page which is quite essential to run elite shopping ads.
If this article was helpful to you, do let us know. We would love to hear from you!
When you run paid ads, CTR is considered as the most valuable element in terms of overall paid results. CTR stands for click-through rate and it is calculated based on the received clicks divided by the number impression.
For example, if you have received 10 clicks and 200 impressions then your CTR will be 5%. If you want to increase the number clicks then you must consider CTR. Each ad copy and keywords have their own CTR.
Want to get clicks on your paid ads, if yes read continue 4 minutes. You will start ramping your paid traffic, save money, and improve the overall paid ads performance by increasing the CTR.
You need to work on ad copy to raise CTR and get a high number of clicks.
Below mentioned are the proven tips that will help to attain higher CTR than your competitors:
1. Use a countdown timer in your ads:
To improve the CTR you need to generate urgency in your ad copy. A countdown timer is one of the best options to attract more users. We have tested downtown timer ads and expanded text ads. Results? We found a 22% high CTR generated by countdown ad copy.
2. Use Ads Extension:
So many ad extensions are available in Google ads but some are extremely important to increase the CTR like site link, callout, promotion, etc.
Ad extensions grab the users’ attention that helps to increase the CTR. Experts say if you use ad extension precisely, it will increase 10% of the CTR.
3. Proper Use Of Primary keywords:
If you utilize primary keywords properly in your ad copy, it will help to increase the CTR. Make sure you use primary keywords in the main headline and display the URL. This technique helps to build the trust of users that they click on the right ads.
4. Use Strong CTA:
Do not ignore CTA in your ad copy. It’s a good way to increase CTR. CTA stands for call-to-action and you can use it with different angles like “Free Quote”, “10% off order now” and etc.
5. Write a Compelling Ad Copy:
Always try to write a compelling ad copy that can stand out from your competitors. If you will write ad copy with the same label of your competitors then CTR will suffer for sure.
In your ad copy use unique selling points, explain to the user why you’re better than your competitors, what additional advantages you provide comparatively from others, etc.
Conclusion:
We have tested all these points in order to raise the CTR and if you will do good practice with these valuable points then it will help you too to get a big push in your ad copy CTR.
Tracking of conversion is one of the essential parts of Google ads. If you did not track your conversion then you did not differentiate between your visitor and your customer in that case both get counted as visitors. This is definitely not quite helpful for you.
In this way, you are just spending your money and do not really have any idea about your real customer. For example, people walk into your shop and do not purchase anything.
How does tracking work?
Tracking in Google ads is done by a pixel that’s a snippet of code. A Pixel is added on your website to track the path of visitors. From that point, you can differentiate between your visitors and customers. For example, you want to track those persons who download your ebook, so you have to add 2 pixels on your website.
The first one is the global tag that tracks all visitors and the second one adds a thank you page (specific page). Thank you pages only appear when someone downloads your ebook.
Now you can track how many people visit your website and how many of them download those ebooks.
So let’s get started on how to track conversions in Google ads.
For proper tracking setup, you need to do two things. First, create a tracking pixel, and second, install that tracking pixel on your website.
Create tracking pixels in Google ads
At first, go over to the tools and settings dashboard and click on conversions under the measurement column.
After that click on the plus button.
Here Google gives options about conversion type. Then you have to choose one out of the 4 options. Each option flow is almost similar to each other. For example, you want to track conversion on a website like a form submission, then you have to select the option “Website”.
After clicking on the website, you have to fill information regarding your objectives in the category section. For instance, lead category or sales category, etc., here you have to select and submit the lead form because we need forms submission.
The next step is to give a name to your conversion like sign-up or form submission etc., it’s up to you.
After the given name, you have to select the value of your conversion. Select “Use the same value for each conversion” and enter a value like each conversion to get you $75 then add $75. Remember to use this option when you have a static product or service value.
You know about your lead that every lead on an average gives you $75 then adds $75 value.
If you have multiple products then select “Use different values for each conversion” because your product value changes every time when someone purchases and leaves your website.
And the 3rd option is to select “Don’t use a value for this conversion action (not recommended)”. This option is not recommended by Google because every conversion has a value that’s’ why Google did not recommend this option. Rest, it’s up to you.
The next step is to select “count”. This means how many conversions to count per click or interaction. You have 2 options: one is “every” and the second is “one”.
Every
This feature provides the information of conversion for example if someone is clicking on your ad and goes to the website and in the 1st time they buy one product, after completing the purchase they buy one more again. This means a person clicks one time but conversions are counted 2 times.
If you are using every count it means you have conversions but in an incorrect way. This is how you’ll not be able to know how many real conversions happened.
One
You can choose this option when you want that every conversion is separately counted. If we take the above example then this time you have only one conversion because there is the same person involved.
The next step is to choose the “Click-through conversion window”. This feature is quite useful. Not everyone converts the first time or maybe less than 1 percent of people convert. By giving a time period your conversion counts as per days to enter here also, you can choose any time period or custom your days.
The next step is Include in “Conversions”. You can select this option when you run a smart campaign based on this selection. The smart campaign targets the right audience based on this conversion which means every time when someone goes through this process then it counts as a conversion.
The next step is to choose the “Attribution model”. This attribution model is very helpful for tracking conversions. In addition to the same, it is very important to understand that your conversions are dependent on this attribution model.
In the case of the lead generation perspective, you have to select the last click.
After clicking on save and continue button. A code is generated which is a tag (pixel). This tag you need to add to your website so that every conversion will be tracked on your website.
How to setup tag (code)
You have two codes: first is a global tag and the second one is event code, you need to implement on your website.
Global tag tracks all website data that fire on every page. You need to add this tag to your header section of the website. If you are using WordPress then use the “header and footer” plugin to easily install this tag.
A second tag (event snippet), you have to add this tag on your thank you page of your website. For example, if someone lands on your website and submits a form then a new page on the screen that should appear as a thank you page. On this page, you have to add the event snippet code so that this is counted as a conversion.
For phone call
All the steps are the same, just choose phone calls in conversion type. Set no conversion value and set call duration like 30 seconds & 40 seconds as you think a person converts after 30 or 40 seconds that count as a conversion. Rest the process is the same.
For app
All the steps are the same, just choose the app in conversion type. Select how you want to track your app conversion and rest the entire process is the same.
CONCLUSION
Every click on your ad does not get conversion but those clicks which get converted are tracked by tag. A tag will help you to find out the right data about your targeting audience. You will be able to analyze data according to your goal. You can also scale your campaign performance based on conversion data.
In the paid ads, the landing page is one of the most powerful elements that play a significant role to get a substantial amount of leads or sales. Well-designed landing pages help to set-up an elite paid campaign and raise business revenue that is the end goal of every business owner.
The Benefit of Good Landing Page In Paid Ads:
After clicking on the paid ads, users land on the page that provides all desired information and which consists of a strong call to action, every advertiser wants their audience to take this action. In paid ads, there are a number of benefits of the landing page but here are two primary benefits for your business.
More PPC Leads: When you use a high-quality landing page it helps to convert more clicks into leads, the reason being users feel they are in the right place and find all whatever they are looking for.
Better Quality Scores: When you use well-designed landing pages, all paid ads platforms give better quality scores because good landing pages are more aligned with the searcher’s intent. This practice helps you get higher quality scores, better result rankings, and low CPC.
Everyone knows a clean landing page helps to generate fruitful results, here are the most valuable points that should be having on your landing page to yield best results.
A Strong heading: Powerful headlines have a tendency to grab the attention of the visitors and entice them to scroll down. Make sure you are using relevant and best headlines on your landing page.
Clean and attractive design: Always build a clean and attractive landing page, use a precise content flow that should present information step by step. Professionals keep their landing pages clean and attractive always which helps to get more leads.
User & Mobile Friendly:Your landing page should not be messed up which in turn makes the users go away. Make your landing page from a user perspective that should depict their problems and solutions in the correct way. These days 80% traffic comes on your landing page through a mobile device, make sure your landing page should be mobile-friendly.
Strong CTA:Every paid advertiser wants the users who visit their landing page, take their desired action. You must give clean and strong CTR so that users easily take action if they are interested to proceed ahead with you.
Use Testimonials:If you want to win the trust of the users about your services then you must show them the best testimonials so they can know what people say about your services. Testimonials are extremely helpful to increase the conversion rate of your landing page.
Fast Loading Speed: Your landing page’s loading speed should be very fast, that’s another valuable point to optimize your land page. In this era no one likes to wait for long, if your landing page has poor loading speed then the user will probably leave your landing page before even opening it.
Final Thoughts:
Effective landing pages are too crucial to run your PPC campaigns. It helps to get a high amount of leads. While creating a new landing page follow these best practices. A high-quality landing page improves the performance of your overall paid campaigns so always use a well-designed landing page.