Tracking of conversion is one of the essential parts of Google ads. If you did not track your conversion then you did not differentiate between your visitor and your customer in that case both get counted as visitors. This is definitely not quite helpful for you.
In this way, you are just spending your money and do not really have any idea about your real customer. For example, people walk into your shop and do not purchase anything.
How does tracking work?
Tracking in Google ads is done by a pixel that’s a snippet of code. A Pixel is added on your website to track the path of visitors. From that point, you can differentiate between your visitors and customers. For example, you want to track those persons who download your ebook, so you have to add 2 pixels on your website.
The first one is the global tag that tracks all visitors and the second one adds a thank you page (specific page). Thank you pages only appear when someone downloads your ebook.
Now you can track how many people visit your website and how many of them download those ebooks.
So let’s get started on how to track conversions in Google ads.
For proper tracking setup, you need to do two things. First, create a tracking pixel, and second, install that tracking pixel on your website.
Create tracking pixels in Google ads
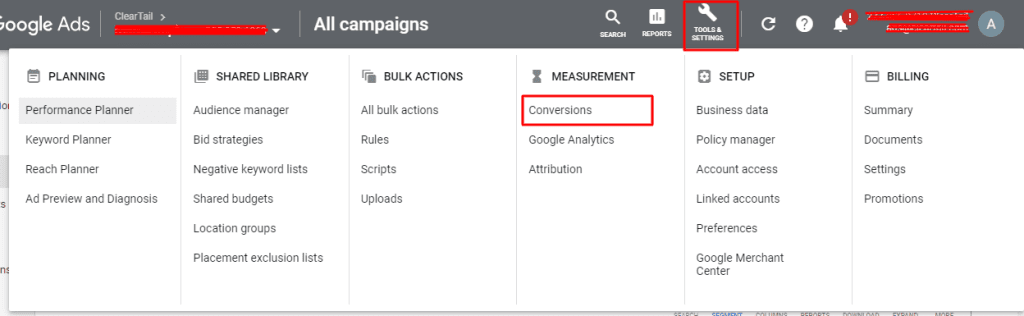
At first, go over to the tools and settings dashboard and click on conversions under the measurement column.
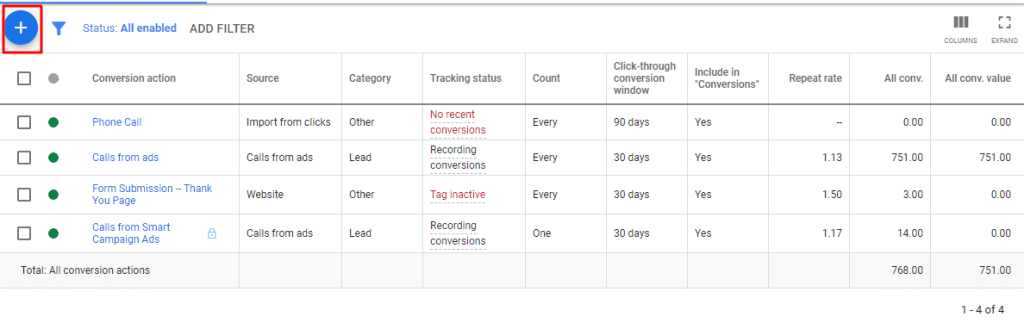
After that click on the plus button.
Here Google gives options about conversion type. Then you have to choose one out of the 4 options. Each option flow is almost similar to each other. For example, you want to track conversion on a website like a form submission, then you have to select the option “Website”.
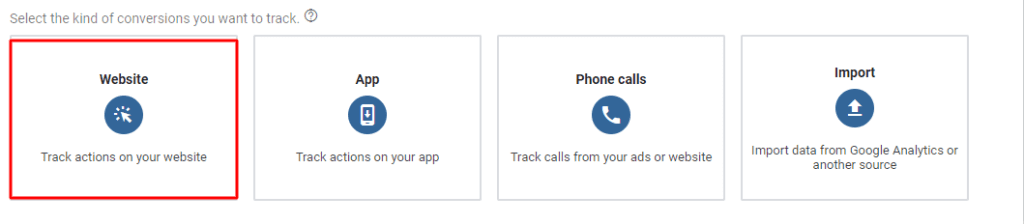
After clicking on the website, you have to fill information regarding your objectives in the category section. For instance, lead category or sales category, etc., here you have to select and submit the lead form because we need forms submission.

The next step is to give a name to your conversion like sign-up or form submission etc., it’s up to you.

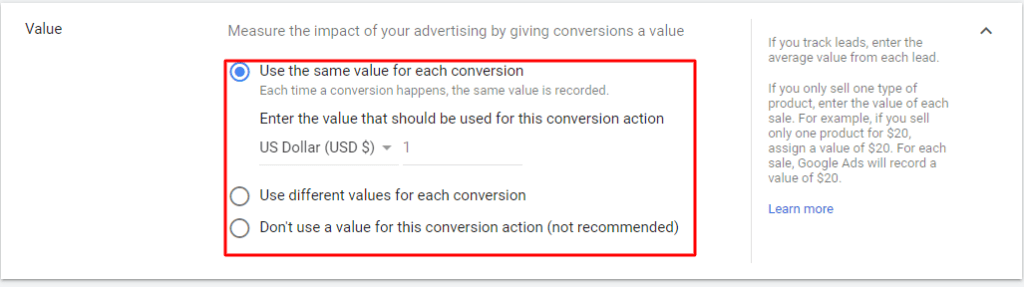
After the given name, you have to select the value of your conversion. Select “Use the same value for each conversion” and enter a value like each conversion to get you $75 then add $75. Remember to use this option when you have a static product or service value.
You know about your lead that every lead on an average gives you $75 then adds $75 value.
If you have multiple products then select “Use different values for each conversion” because your product value changes every time when someone purchases and leaves your website.
And the 3rd option is to select “Don’t use a value for this conversion action (not recommended)”. This option is not recommended by Google because every conversion has a value that’s’ why Google did not recommend this option. Rest, it’s up to you.
The next step is to select “count”. This means how many conversions to count per click or interaction. You have 2 options: one is “every” and the second is “one”.
Every
This feature provides the information of conversion for example if someone is clicking on your ad and goes to the website and in the 1st time they buy one product, after completing the purchase they buy one more again. This means a person clicks one time but conversions are counted 2 times.
If you are using every count it means you have conversions but in an incorrect way. This is how you’ll not be able to know how many real conversions happened.
One
You can choose this option when you want that every conversion is separately counted. If we take the above example then this time you have only one conversion because there is the same person involved.

The next step is to choose the “Click-through conversion window”. This feature is quite useful. Not everyone converts the first time or maybe less than 1 percent of people convert. By giving a time period your conversion counts as per days to enter here also, you can choose any time period or custom your days.
The next step is Include in “Conversions”. You can select this option when you run a smart campaign based on this selection. The smart campaign targets the right audience based on this conversion which means every time when someone goes through this process then it counts as a conversion.
The next step is to choose the “Attribution model”. This attribution model is very helpful for tracking conversions. In addition to the same, it is very important to understand that your conversions are dependent on this attribution model.
In the case of the lead generation perspective, you have to select the last click.

After clicking on save and continue button. A code is generated which is a tag (pixel). This tag you need to add to your website so that every conversion will be tracked on your website.
How to setup tag (code)
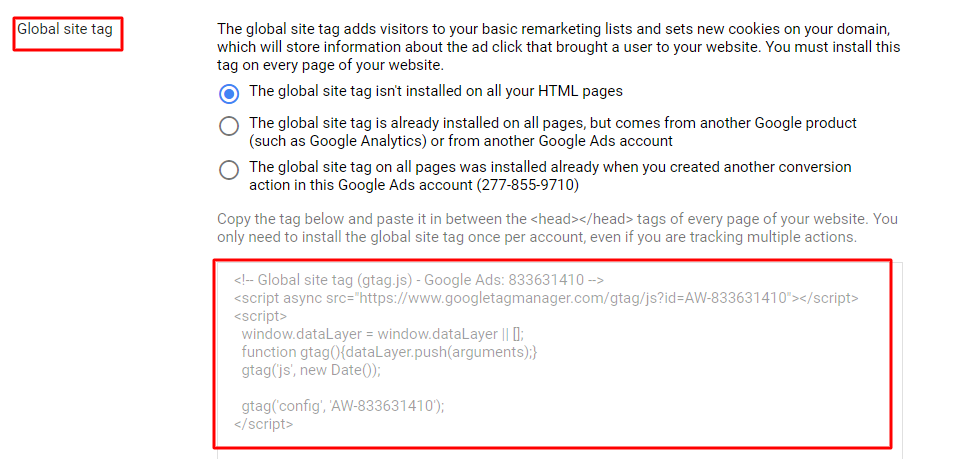
You have two codes: first is a global tag and the second one is event code, you need to implement on your website.
Global tag tracks all website data that fire on every page. You need to add this tag to your header section of the website. If you are using WordPress then use the “header and footer” plugin to easily install this tag.
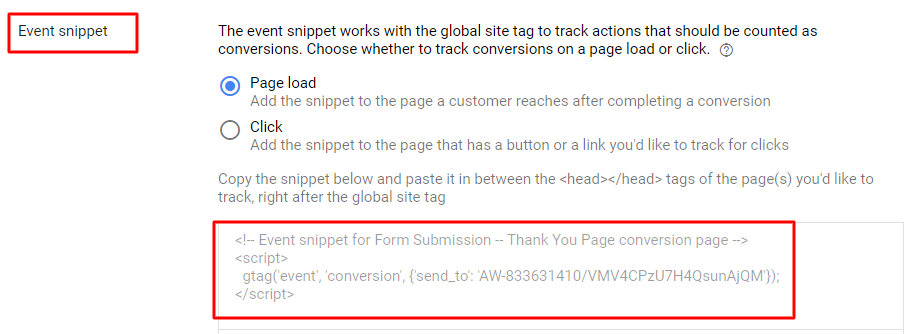
A second tag (event snippet), you have to add this tag on your thank you page of your website. For example, if someone lands on your website and submits a form then a new page on the screen that should appear as a thank you page. On this page, you have to add the event snippet code so that this is counted as a conversion.
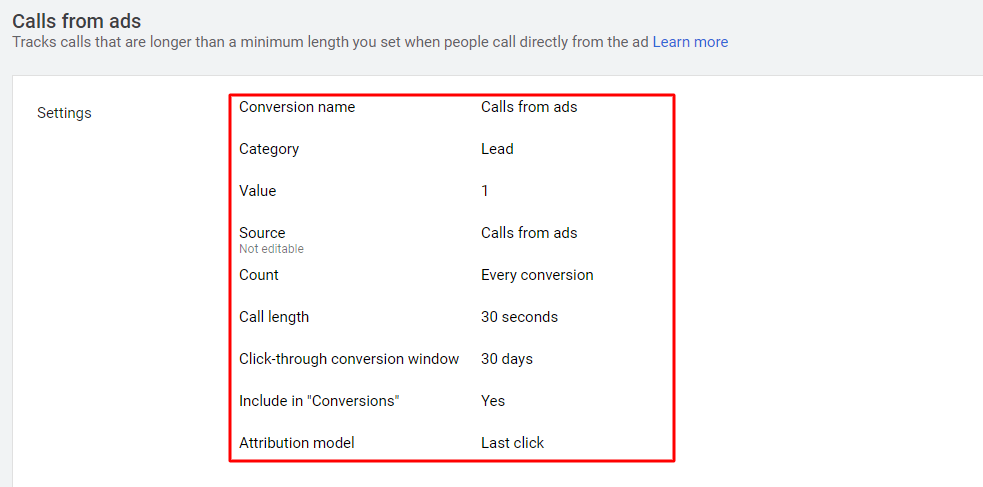
For phone call
All the steps are the same, just choose phone calls in conversion type. Set no conversion value and set call duration like 30 seconds & 40 seconds as you think a person converts after 30 or 40 seconds that count as a conversion. Rest the process is the same.
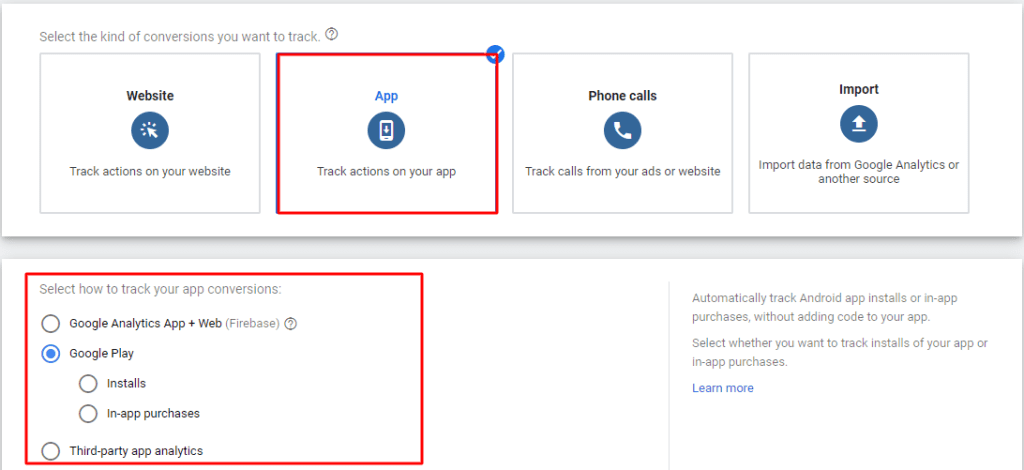
For app
All the steps are the same, just choose the app in conversion type. Select how you want to track your app conversion and rest the entire process is the same.
CONCLUSION
Every click on your ad does not get conversion but those clicks which get converted are tracked by tag. A tag will help you to find out the right data about your targeting audience. You will be able to analyze data according to your goal. You can also scale your campaign performance based on conversion data.
")


